


Planning a safari, holiday, business trip or family visit to Kenya? Before boarding your flight, most international travellers need to complete Kenya’s Electronic Travel Authorisation (eTA) process.
The Kenya eTA application is completed online through the official Government of Kenya platform. The process is designed to collect your personal information, passport details, travel plans, accommodation information and supporting documentation before you travel.
While the application is straightforward, there are several stages where travellers need to enter information carefully. A mistake in your passport number, name, travel dates or supporting documents can create unnecessary delays.
In this guide, we take you through the Kenya eTA application process step by step, from opening the official website to receiving your approved authorisation.
Important: Kenya’s immigration requirements can change. Always verify the latest requirements directly through the official Kenya eTA portal before submitting an application.
What Is the Kenya eTA?
The Kenya Electronic Travel Authorization, commonly known as the Kenya eTA, is an online travel authorization that eligible foreign visitors obtain before travelling to Kenya.
It is applied for electronically rather than through a traditional embassy visa application.
The official Government of Kenya platform states that visitors who require an eTA must have an approved authorisation before starting their journey to Kenya. (Kenya eTA)
An approved eTA, however, does not automatically guarantee admission into Kenya. Final admission remains subject to immigration clearance at the point of entry.
Before You Start Your Kenya eTA Application
Before opening the application, prepare everything you are likely to need.
An approved eTA, however, does not automatically guarantee admission into Kenya. Final admission remains subject to immigration clearance at the point of entry.
Required documents and information
A valid passport
At least six months of passport validity from your planned arrival date
At least one blank passport page
A selfie or passport-style photograph
An active email address
A telephone number
Your flight or travel itinerary
Arrival and departure information
Accommodation booking confirmation
A valid payment method
Additional documentation may be required depending on the purpose of your visit.
For example, business travellers may need an invitation letter and company registration documents, while travellers visiting family may need an invitation letter and identification documents from their host. (Kenya eTA)
Step by Step Kenya eTA Application Process
Step 1: Visit the Official Kenya eTA Website
Begin your application through the official Government of Kenya Electronic Travel Authorisation website.
Official Kenya eTA Application Portal
The homepage provides options to:
Apply for an eTA
Check an existing application
Learn about eligibility
Read the application requirements
Access frequently asked questions
The official portal is operated under Kenya’s Directorate of Immigration Services within the State Department for Immigration and Citizen Services. (Kenya eTA)
Important warning
Be cautious when searching online for “Kenya visa” or “Kenya eTA.”
There are third-party websites that may offer application assistance or charge additional service fees. If you are completing the application yourself, use the official Government of Kenya platform.
Step 1 — Click “Apply Now”
Begin your application from the official Kenya eTA website.
The Government of Kenya specifically directs applicants to visit the official eTA portal and click “Apply Now.”
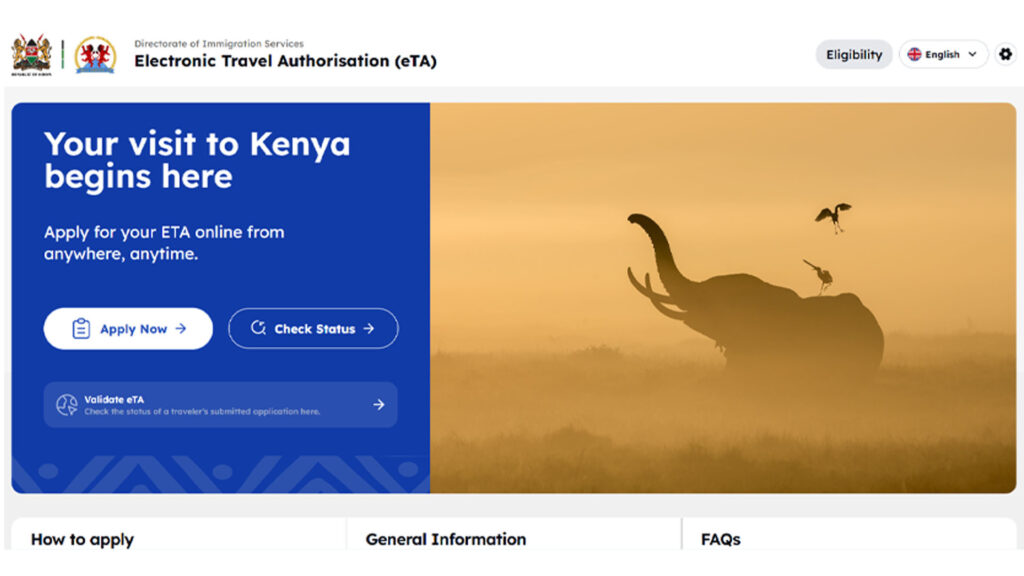
Illustration: Official eTA homepage → large APPLY NOW button.
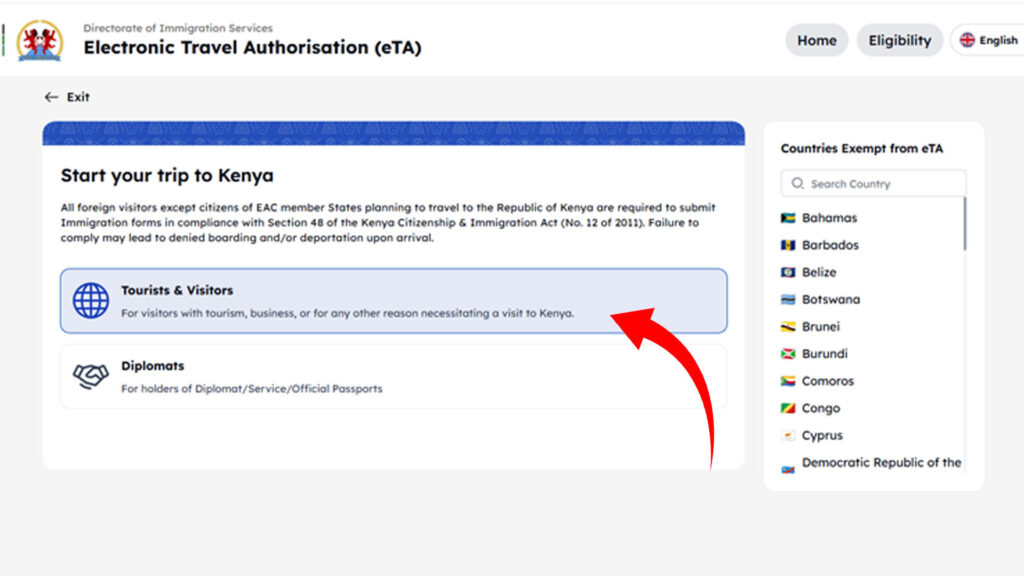
Step 2 — Choose Your Traveller Category
You will first distinguish between:
Tourists & Visitors
Diplomats
For a normal safari, holiday, business trip or other visit to Kenya, the Tourists & Visitors option is the relevant pathway. Diplomats and holders of Diplomatic/Service/Official passports follow the diplomatic pathway.
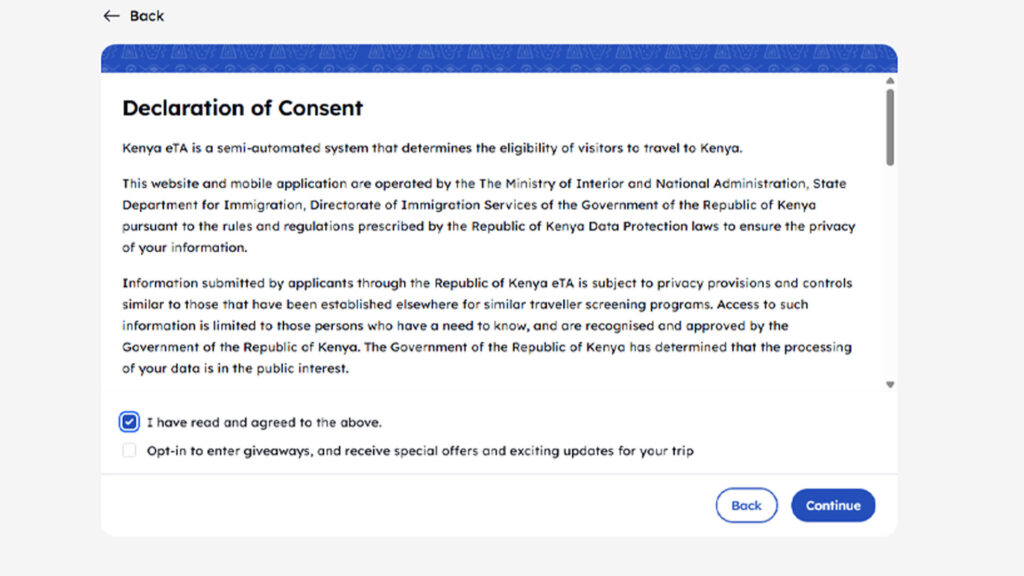
Step 3 — Declaration & Consent
The applicant reads the Declaration of Consent and confirms that they understand and agree to the terms.
This is particularly important because the official declaration states that the information provided will be used to determine eligibility to travel and that false or incomplete information may result in rejection. It also makes clear that an approved eTA does not itself constitute the final authority to enter Kenya.
Step 4 — Select Your Country of Residence
Select the country where you currently live and pay taxes.
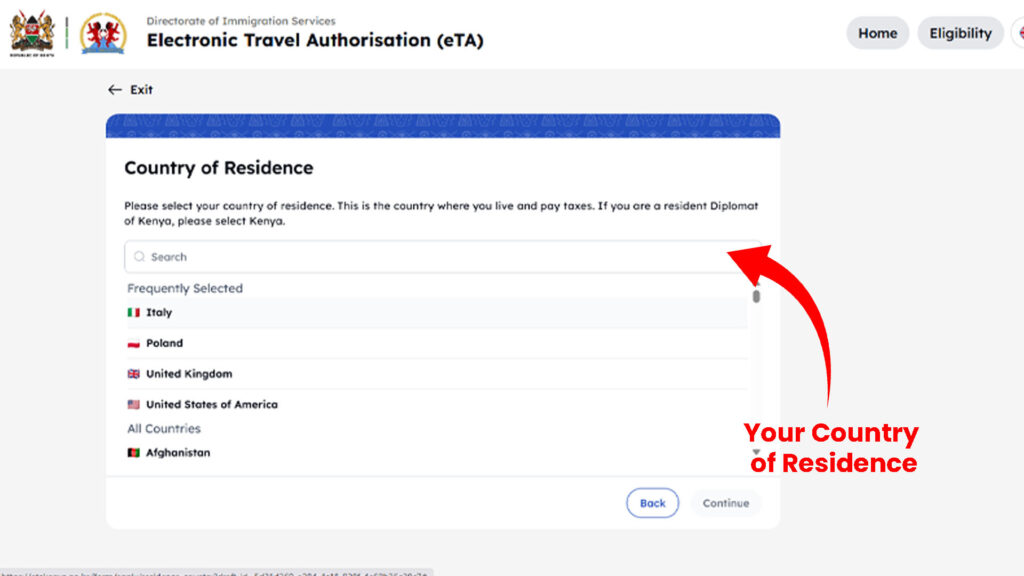
Country of Residence: [Select Country]
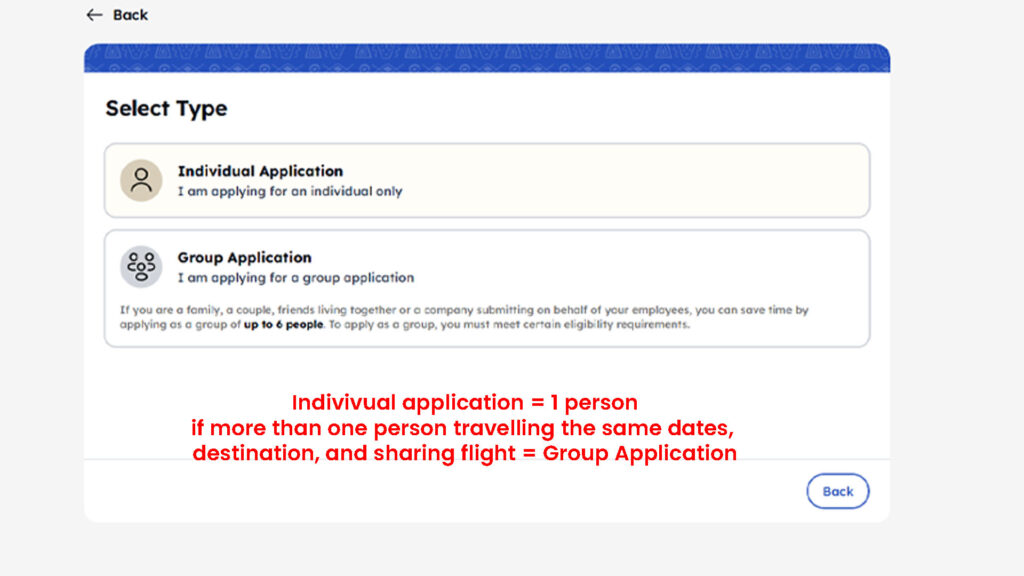
Step 5 — Select Application Type
You then choose whether you are submitting:
Individual Application
Group Application
If you’re travelling as a family, couple or group, the official FAQ confirms that you can select Apply as a Group. However, each traveller still requires an individual eTA.
Step 6 — Passport Information
This is one of the stages where your screenshot will be particularly useful.
Enter your passport information and carefully counter-check the information against the details automatically picked up by the system on the right-hand panel.
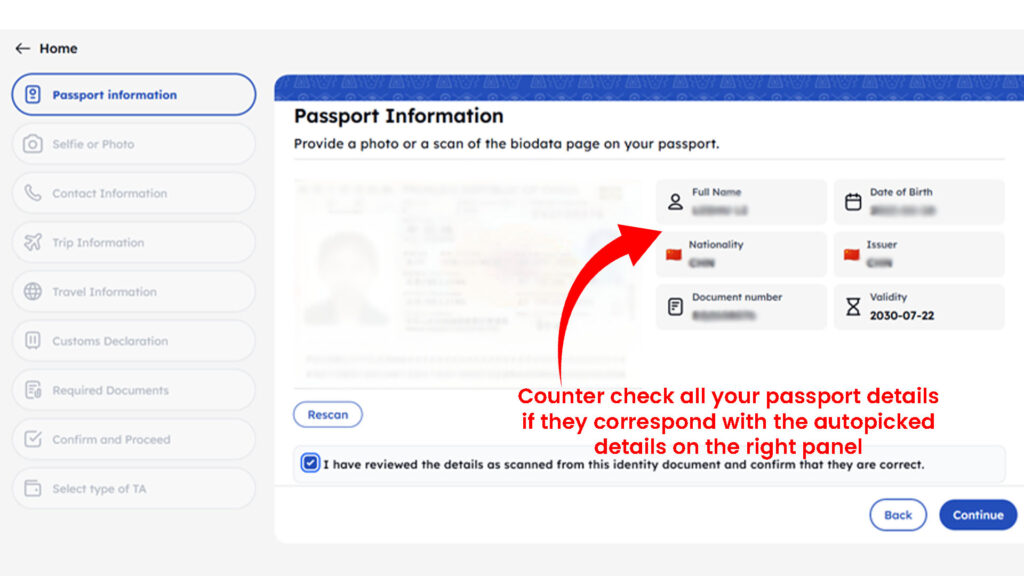
Do not simply assume the automatically detected information is correct. Compare it carefully with your passport before proceeding.
Check:
Full name
Passport number
Nationality
Date of birth
Passport issue date
Passport expiry date
The official requirements state that the passport should generally have at least six months’ validity from the planned arrival date and at least one blank page.
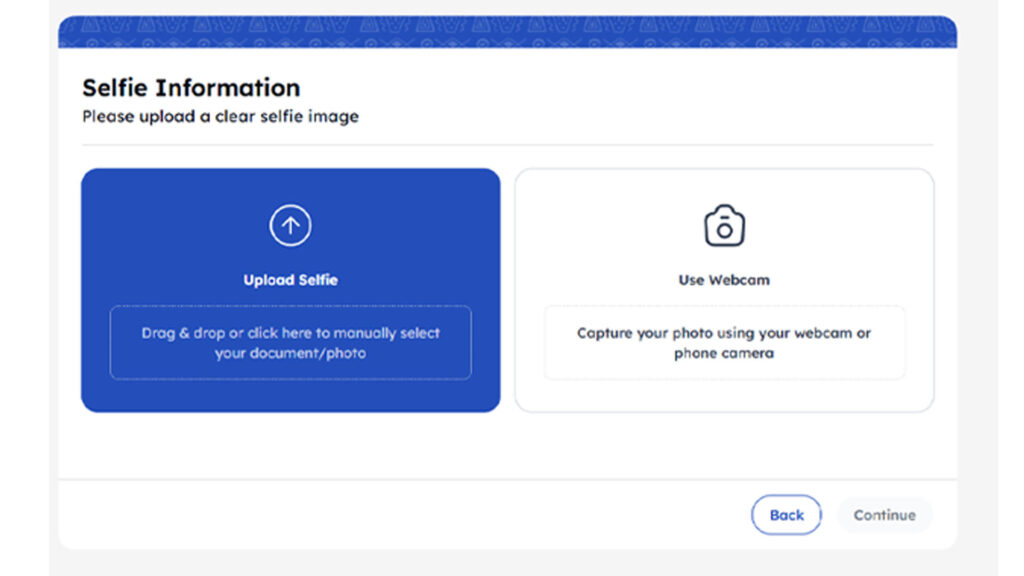
Step 7 — Upload Your Selfie / Photo
Upload the required selfie or passport-type photograph.
The official Kenya eTA requirements list a selfie or passport-type photo among the documents required for travellers.
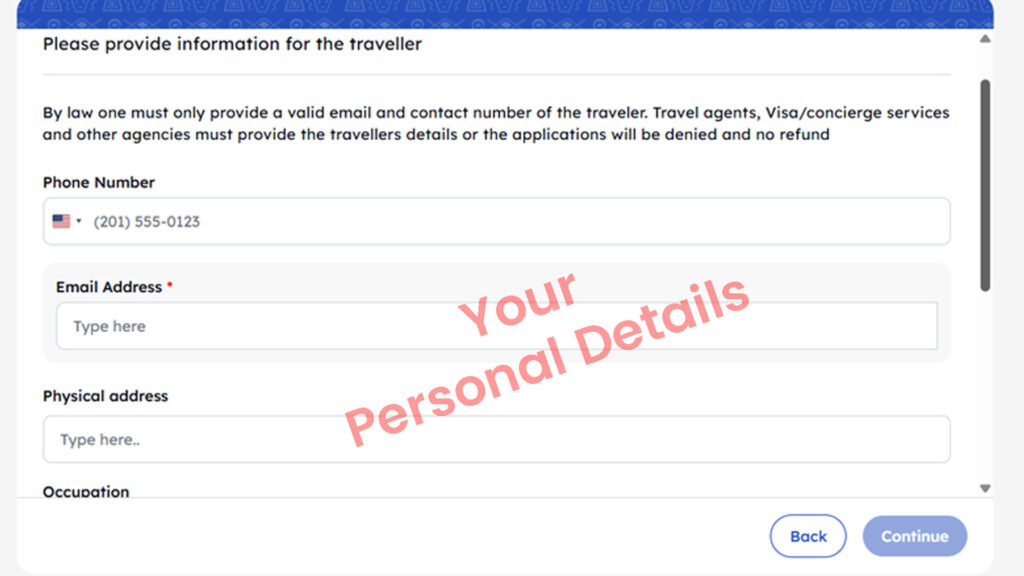
Step 8 — Provide Your Traveller Information
This is where the applicant enters their personal/contact information.
⚠️ PAY SPECIAL ATTENTION TO YOUR EMAIL ADDRESS
Make sure the email address you provide is correct and accessible. Your application communications and approved eTA document are sent electronically, so an incorrect email address can cause unnecessary problems.
The official system sends application confirmation, payment confirmation where applicable, and the eventual approval/refusal notification by email.
Enter your information exactly and accurately.
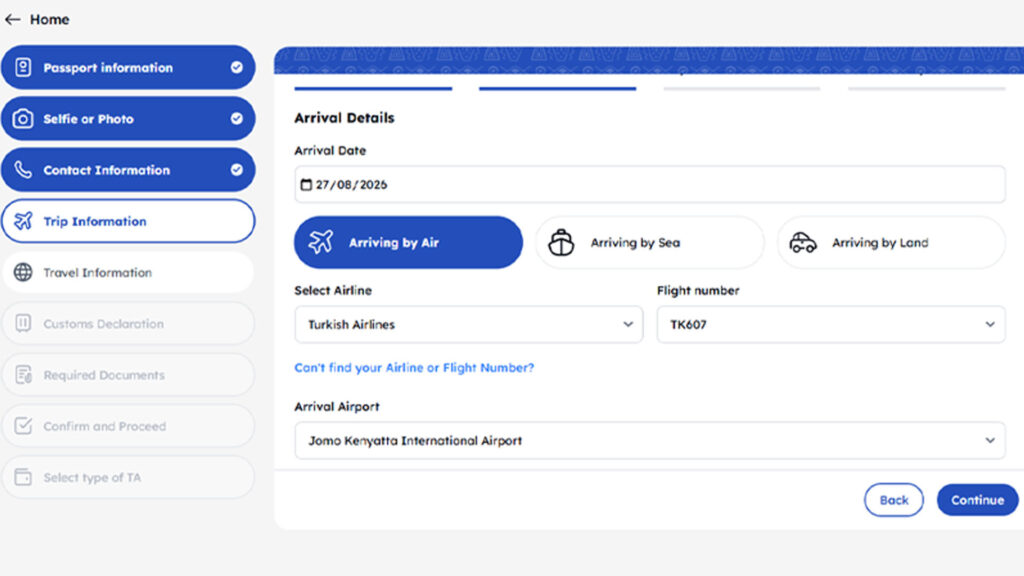
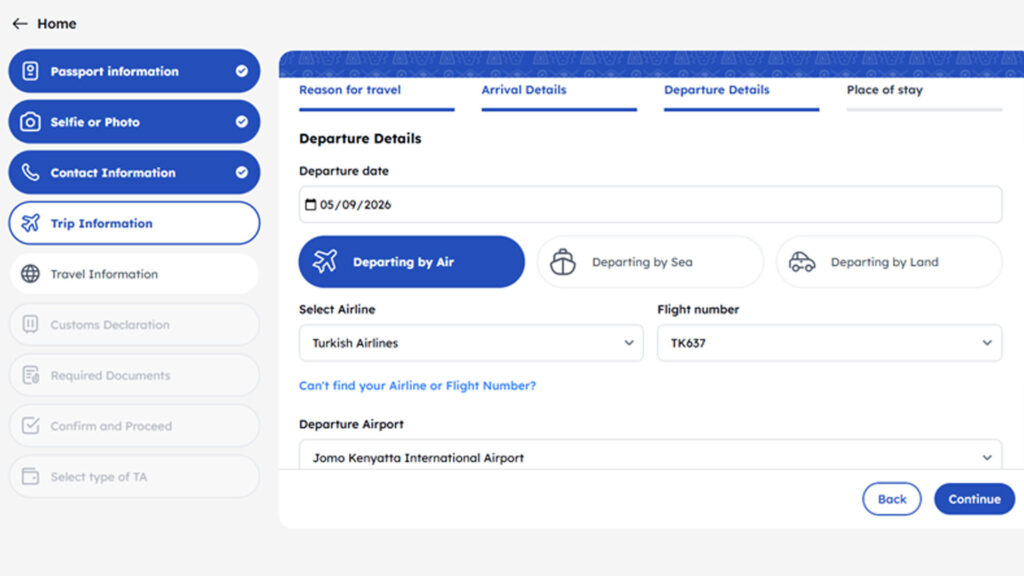
Step 9 — Trip Information
The traveller provides details about the planned trip, including:
Reason for travel = Tourism
Arrival details – Host country arrival flight details
Departure details – Host country departure flight details
For a safari traveller, this information should correspond with the actual travel arrangements.
The official requirements include details of the traveller’s arrival and departure itinerary.
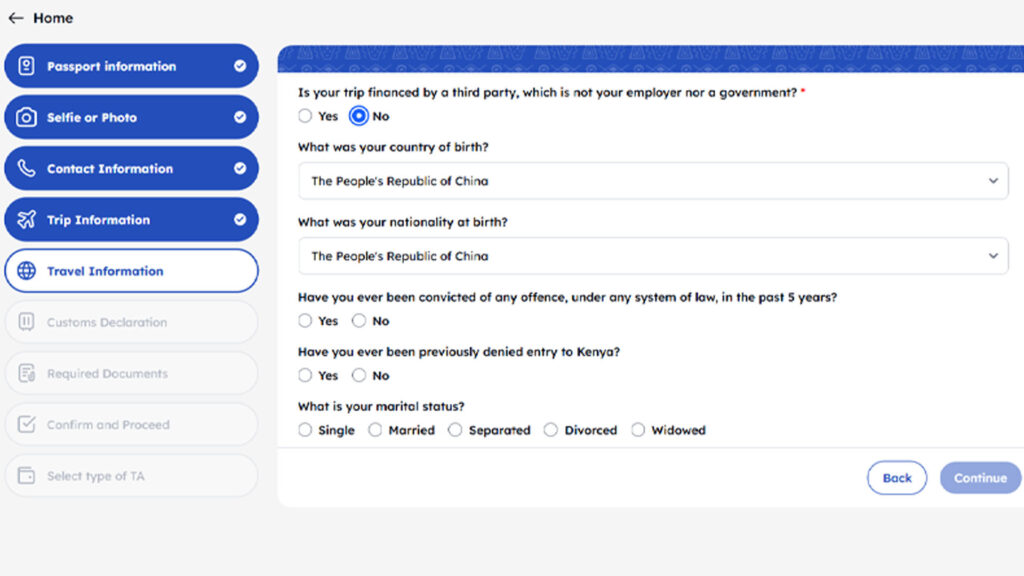
Step 10 — Is Your Trip Financed by a Third Party?
This is a separate question in the application and should absolutely have its own illustration in your guide.
The traveller should answer according to their actual circumstances.
For example, if another person, organisation or entity is financing the trip, provide the information requested by the system.
Is your trip financed by a third party?
🟢 YES
⚪ NO
Step 11 — Customs Declaration
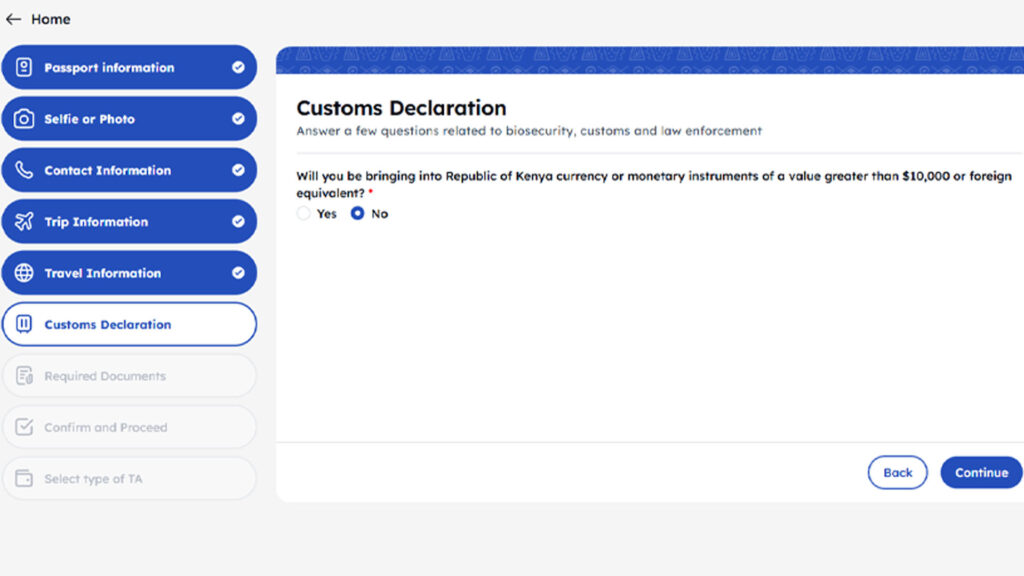
I would call this “Customs Declaration”, not “Customer Declaration.”
The portal describes this stage as questions relating to biosecurity, customs and law enforcement. One of the questions, for example, asks whether the traveller will bring currency or monetary instruments exceeding US$10,000 or its foreign equivalent into Kenya.
The key message:
Answer all customs and declaration questions truthfully and accurately.
Step 12 — Upload Required Documents
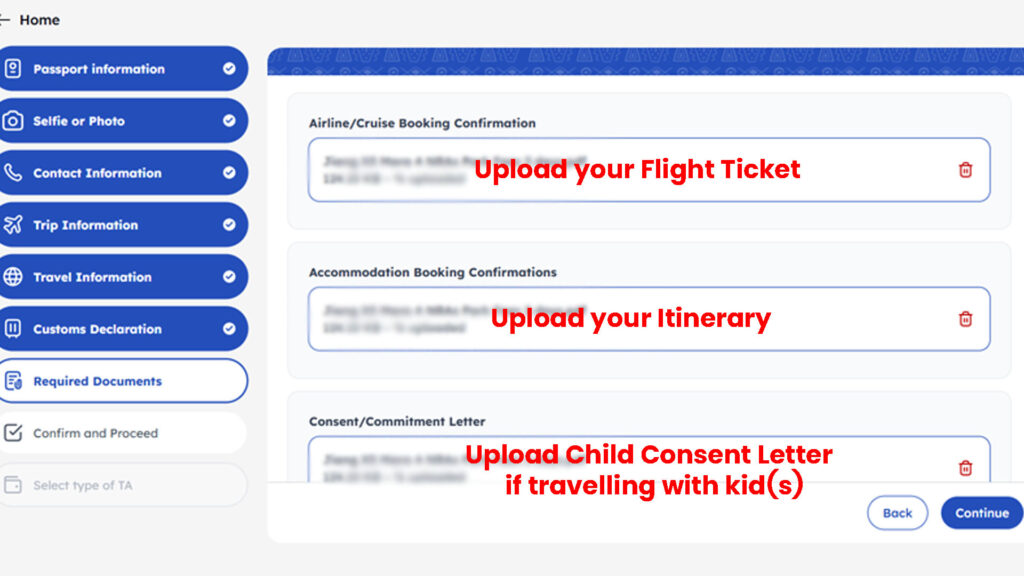
The official eTA site confirms that travel itinerary and other supporting documents may be required depending on the circumstances and purpose of travel.
📄 Flight ticket
📄 Travel itinerary provided by the safari operator
📄 Child consent letter — where applicable when travelling with a minor
If you are travelling with a safari company, use the official itinerary provided by your tour operator and make sure the information is consistent with the rest of your application.
Step 13 — Confirmation / Traveller’s Declaration
Before proceeding review and confirm your declaration and application information.
This is your “STOP AND CHECK” stage.
Kindly verify:
✔ Passport details
✔ Name spelling
✔ Email address
✔ Arrival date
✔ Departure date
✔ Flight information
✔ Travel purpose
✔ Uploaded documents
The official declaration warns that false or incomplete information can result in rejection.
Step 14 — Select the Type of eTA
The applicant selects the applicable eTA service.
For a normal tourist application, this will generally be the Standard Application.
The official FAQ currently states that the normal processing option starts at US$30, while an expedited option is available for an additional fee. Fees can change, so your final article should verify the live amount immediately before publication.
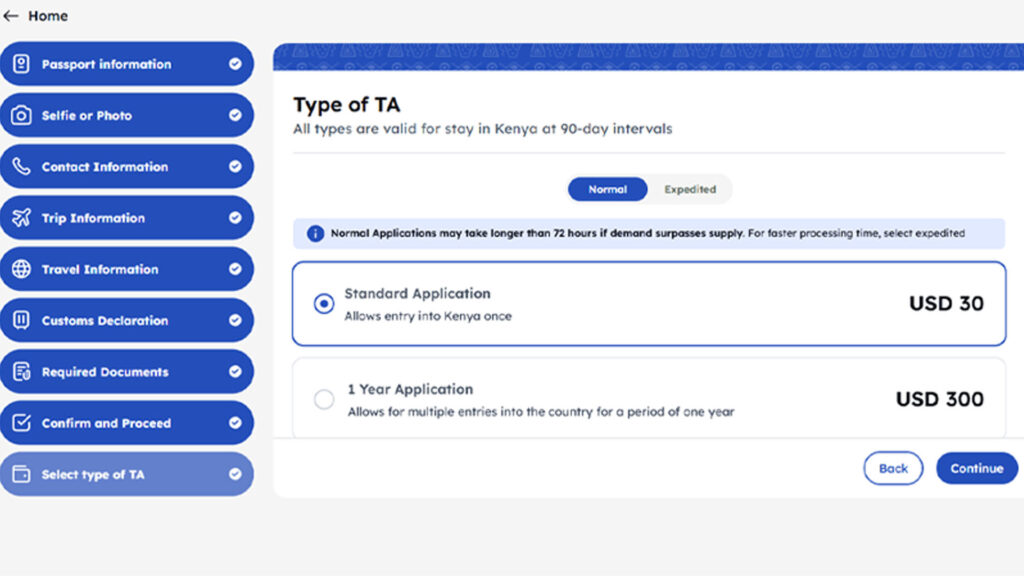
STANDARD
Regular processing
EXPEDITED
Faster processing
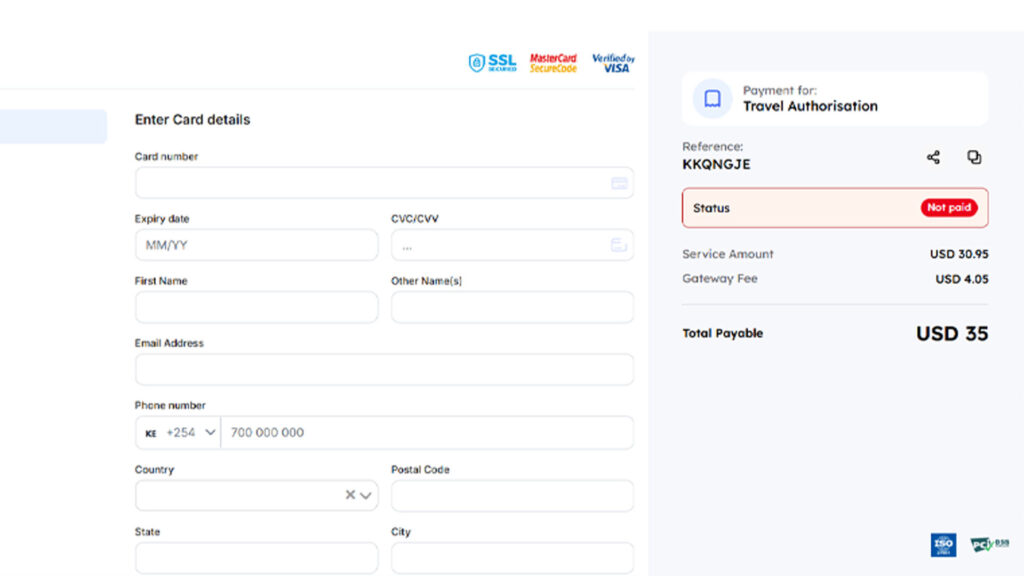
Step 15 — Proceed to Payment
The final stage you’ve identified is payment.
The applicant proceeds to pay using the available payment method.
The official FAQ states that payment confirmation is sent by email where applicable.